This page is a how-to for using the printrbot at the Dayton Diode hackerspace. It covers general things about 3D printing and also specific things about how our printrbot is installed and set-up.
How to Use the Dayton Diode Printrbot[]
RepRap Toolchain: http://objects.reprap.org/wiki/RepRap_CAM_Toolchains
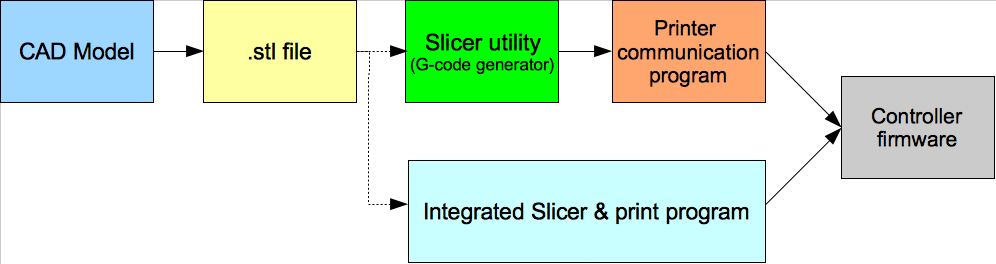
There is a good intro FAQ on the MAKE:blog. Here's the basic work-flow:
- Design or download (e.g. MrJaws on thingiverse) a part (needs to be in stl format).
- Slice the stl and generate gcode. Slic3r is a popular option.
- Load the gcode to the printer management software. We have pronterface.
- Warm up the bed (110 C) and the extruder (230 C).
- Print.
NOTE: There seems to be a problem with the thermal senser on the bed. This sometime causes pronterface to never start printing because it thinks the bed is not to temp. A workaround is to manually edit the gcode compiled by slicer. Open the gcode in a text editor and delete the line that says "wait for bed temp". It should be in the top 20 lines or so.
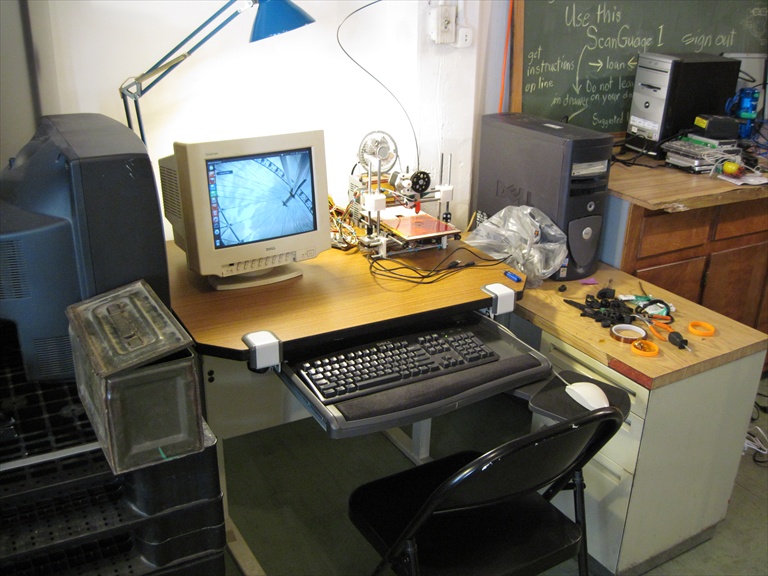

Printrbot Station
Our "print station" has a computer with all of the software that you will need already installed.
Design[]
Demo design step with free open source software.
Here's a sketch of an auto-transformer enclosure [XXX sketch here XXX]. We will demonstrate how to model this in several free open source tools.
Photos and Point Clouds as Modeling Aids[]
Take a bunch of pictures of the thing you want to model. Then use open source tools such as Bundler and PVMS-2 to create a point cloud from the multiple views. This point cloud can then be imported in to your drawing program to aid your modeling efforts.

.jpg)
")
")
")
")
")
")
")
")
")
")
")
")
")
")
")
")
")
")
")
")
")
")
")
")
")
")
")
")
")
")
")
")
")
")
Blender[]
How to w/blender.
FreeCAD[]
How to w/FreeCAD.
BRLCAD[]
How to w/BRLCAD.
OpenSCAD[]
How to w/OpenSCAD
Slice[]
Slice the stl file with Slic3r. Detail settings for our printer.
Print[]
Print the file using pronterface.